
SKINCARE TALK WITH BOLA AKINBOADE-BELLO: THE OIL CLEANSING METHOD
I’m just
going to say it the way it really is and put this out there from the scratch; I
haven’t washed my face in 2 months. Yes, you
read that correctly. I haven’t washed my face in 2 months…Well, not with soap, anyways.
And you know what? I absolutely love it! I do NOT miss my old facial cleansers
one single bit! And believe me, I’ve tried every kind. Liquids, bars, creams,
foams, etc. You name it, I’ve tried it. And no matter what perfect list of
promises was listed on the packaging, my face always still felt either too dry,
too oily, too pore-y, or worse, just plain pimply
So a few
months ago, I came across this crazy idea: washing your face with oil. To which
you may be thinking, “Oil? What?! No way! That goes against everything I’ve
ever been taught!”
months ago, I came across this crazy idea: washing your face with oil. To which
you may be thinking, “Oil? What?! No way! That goes against everything I’ve
ever been taught!”
And you’d be
absolutely right. It does go against everything we’ve been taught – but maybe
that’s not such a bad thing!
absolutely right. It does go against everything we’ve been taught – but maybe
that’s not such a bad thing!
The basic
concept of this skin care and cleansing method is that the oil used to massage
your skin will dissolve the oil that has hardened with impurities and found
itself stuck in your pores. The steam will open your pores, allowing the oil to
be easily removed. Should you need it, the smallest drop of the same oil
formula patted over damp skin will provide the necessary lubrication to keep
your skin from over-compensating in oil production.
After using
the oil cleansing method for a few weeks, I decided that I absolutely loved it,
and officially threw away my last bar of face soap. Then I ventured out to find
a couple more homemade products to round out my all-natural face wash routine.
So this is part 1 of a series of upcoming posts about the short list of
natural, homemade products I use to care for my skin.
When you
think about all the products being marketed to us to help us “improve” our skin
– soaps, moisturizers, scrubs, toners, astringents, anti-aging this and that…
The truth is we don’t need any of those overpriced, chemical-laden,
concoctions.
think about all the products being marketed to us to help us “improve” our skin
– soaps, moisturizers, scrubs, toners, astringents, anti-aging this and that…
The truth is we don’t need any of those overpriced, chemical-laden,
concoctions.
All you need
is a few homemade alternatives for healthy, refreshed, naturally beautiful
skin!
is a few homemade alternatives for healthy, refreshed, naturally beautiful
skin!
THE
OIL-CLEANSING METHOD
OIL-CLEANSING METHOD
Do not be
afraid of applying oil to your face. Oil, alone, will not bring you blemishes.
Pimples, cysts, zits, blackheads, whiteheads…these are a result of several
different factors including hormones, bacteria, dead skin cells and the buildup
of these factors. Your skin naturally produces oil because it needs it. It is
not a malicious force to be reckoned with; it is therefore the benefit of your
skin, allowing your largest organ to function properly. It is naturally
occurring. Not only does your natural oil help lubricate, it also heals,
protects, and moisturizes your skin so that it may function properly. Properly
functioning skin is beautiful, clear, and glowing. Learning to work with your
skin, not against it, will save you tremendously.
Basically,
you use a mixture of castor oil, carrier oils, and optionally, essential oils,
in differing ratios, to “wash” your face. It also makes a great makeup remover!
you use a mixture of castor oil, carrier oils, and optionally, essential oils,
in differing ratios, to “wash” your face. It also makes a great makeup remover!
Below is a
recipe for my favorite oil ratio, along with my preferred technique for
washing, and some extras. Steps 4, 5, and 7 are completely optional, and I only
do them if I have the time or if I’m feeling up for a good pampering session.
recipe for my favorite oil ratio, along with my preferred technique for
washing, and some extras. Steps 4, 5, and 7 are completely optional, and I only
do them if I have the time or if I’m feeling up for a good pampering session.
Note that I
have combination skin. If your skin is more oily, you’ll want to increase the
castor oil. If your skin is more dry, you’ll want to increase the carrier oils
have combination skin. If your skin is more oily, you’ll want to increase the
castor oil. If your skin is more dry, you’ll want to increase the carrier oils
Recipe
• 1 part castor oil + 1 part olive oil
+ 1 part grape seed oil
+ 1 part grape seed oil
• A few drops of essential oil,
optional (lavender or tea tree are my favorites)
optional (lavender or tea tree are my favorites)
• Add oils to a squeeze bottle and
swirl to combine.
swirl to combine.
Technique
1. Start With a Dry Face. Pour a
quarter-sized amount of oil mixture into your palm.
quarter-sized amount of oil mixture into your palm.
2. Massage Your Face. Vigorously rub the
oil between your palms to warm it up. Gently apply the oil to your face in a
circular motion. Massage it into your skin, but don’t rub too hard. Continue to
massage the oil into your skin for 30-60 seconds.
oil between your palms to warm it up. Gently apply the oil to your face in a
circular motion. Massage it into your skin, but don’t rub too hard. Continue to
massage the oil into your skin for 30-60 seconds.
3. Steam Your Pores. Turn on the tap to
very hot water (as hot as you can stand, but not scalding!). Saturate a wash
cloth, wring it out, then lay it across your face to steam your pores open.
Leave it on until it cools back down to room temperature.
very hot water (as hot as you can stand, but not scalding!). Saturate a wash
cloth, wring it out, then lay it across your face to steam your pores open.
Leave it on until it cools back down to room temperature.
4. Massage Again. (optional) Massage your
now steamed, oily skin again for another 5-10 seconds to work out any
impurities from your pores.
now steamed, oily skin again for another 5-10 seconds to work out any
impurities from your pores.
5. Steam Again. (optional) Rinse the wash
cloth, wring it out, and lay it on your face a second time.
cloth, wring it out, and lay it on your face a second time.
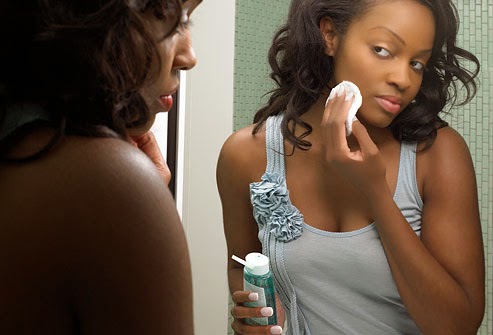
6. Clean Your Face. Once it cools down,
rinse it again, then gently wipe your face clean, removing all the dirt and
impurities from your skin and pores. Rinse the wash cloth and wipe your face
again until there’s no more oil left on your skin (about 1 or 2 more times).
rinse it again, then gently wipe your face clean, removing all the dirt and
impurities from your skin and pores. Rinse the wash cloth and wipe your face
again until there’s no more oil left on your skin (about 1 or 2 more times).
7. Moisturize. (0ptional) Your skin will
look and feel better right from the first time! Your face will be brighter,
dewey-looking, and very soft. If needed, you may moisturize with a tiny bit of
one of your carrier oils (in my case, either olive or grape seed), but most
likely, you won’t need to. Coconut oil is also another great moisturizer – just
a tiny bit goes a long way.
Tea Tree Oil
and Lavender are great for their anti-septic and anti-inflammatory properties
and Lavender are great for their anti-septic and anti-inflammatory properties
(Bola
Akinboade-Bello is a lifestyle blogger, fashion designer and beauty therapist/cosmetologist.
She started her journey into the fashion and beauty industry as a model in 1999
and modelled for top fashion and beauty brands. In March 2006, she joined City
People Media Group as a style writer, and rose with a short period to become
the Fashion Editor. Her clothing line, Betyl BAT Clothing and Accessories and
natural skincare range, Chanterelle Skincare, are doing great in the market)

BEBEAKINBOADE is the fresh voice of African style, offering an informative, inspiring and entertaining mix of fashion,beauty ,entertainment,events ,place, inspirational and much more
Latest posts by bebeakinboade (see all)
- EVERYDAY MAKEUP ROUTINE FOR A FRESH AND NATURAL LOOK - April 6, 2024
- MIXING AND MATCHING PATTERNS LIKE A PRO - February 23, 2024
- 10 WARDROBE ESSENTIALS EVERY FASHIONISTA SHOULD OWN - February 11, 2024